Walk-in Queuing and Kiosk
Advisors and other student support staff can use queues and kiosks to streamline walk-in appointments. The Queue Management page lets you coordinate and manage advisor queues in an advising office.
Important: A team member with the Manage Services permission needs to define Services for each advising location or office to facilitate categorizing appointments and signing in via a kiosk.
Note: A “kiosk” here does not mean permanent equipment but rather a laptop or tablet that you make available for students to log in for self-service (walk-ins and check-ins) at your advising location.
Today’s Schedule
All advisors see the Today’s Schedule tab on the Calendar, for managing both their scheduled appointments and their walk-in appointment queues.
Today’s Schedule has four sections:
1 | Upcoming Appointments – This section shows which appointments are scheduled today with the advisor, along with some details about each appointment. The advisor can use the Check In button to check the student in for their appointment. They can also edit appointment details or mark the appointment as missed.

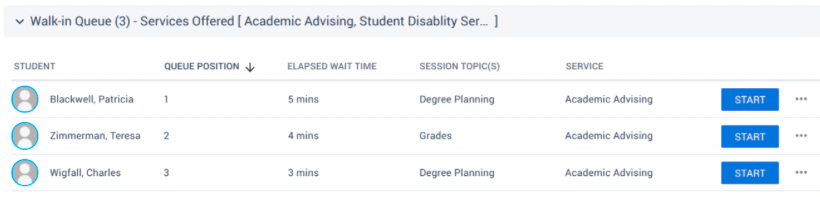
2 | Walk-In Queue – This section shows which students are in the queue to meet with the advisor for Walk-in appointments. This queue includes students who have signed in via the Kiosk and students that have been added to the queue by the Advisor or Queue Manager. Advisors begin a walk-in appointment by selecting the Start button. They can also edit the appointment details, mark the appointment as completed, move the student into a First Available Queue, or remove the student from the queue. (See below for setting up advising Services.)
3 | First Available Queue – This section shows the First-Available Queue for each service that the advisor belongs to. (See below for setting up advising Services.) This queue includes students who have signed in via the Kiosk and students that have been added to the queue by the Advisor or Queue Manager. The first-available queue is shared by all available advisors in that service. Advisors use the Pick Up button to move the student into their Walk-in Queue.

4 | Completed – This section shows all completed appointments for the day, both Walk-in and Schedule Ahead.
How do I create a queue?
When queue management is enabled, all you need to do is create walk-in hours on the calendar with a service selected. During your walk-in hours, you or the queue manager can add students to the queue.
Adding a kiosk — If the kiosk has been launched for a Location that includes the service or services you’ve selected for the Walk-in hours, then your queue can be joined by students via the kiosk.
Queue Management
Users with the Queue Manager permission (which can be added for a user in User Management) can manage the Queues for all of the advisors in the Services they manage (see below for more information about Services).
Queue Management has three sections:
1 | First Available Queues – The first available queue for each Service the user manages displays here. This queue is shared between all members of the service. These queues include students who have signed in via the Kiosk and those who have been added to the queue by the Advisor or Queue Manager. The queue manager can move students between First Available Queues, or they can move the student to an individual advisor’s queue.
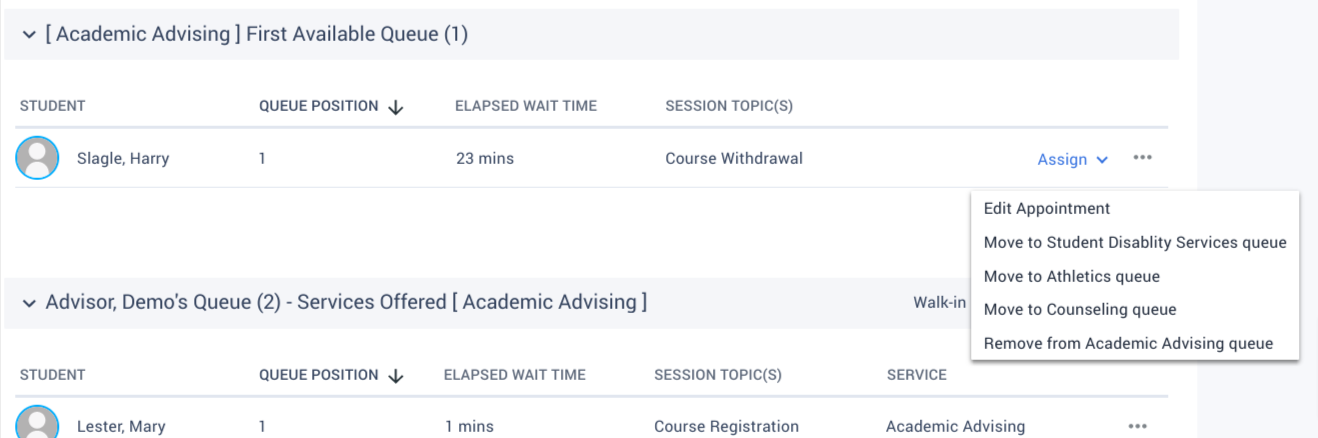
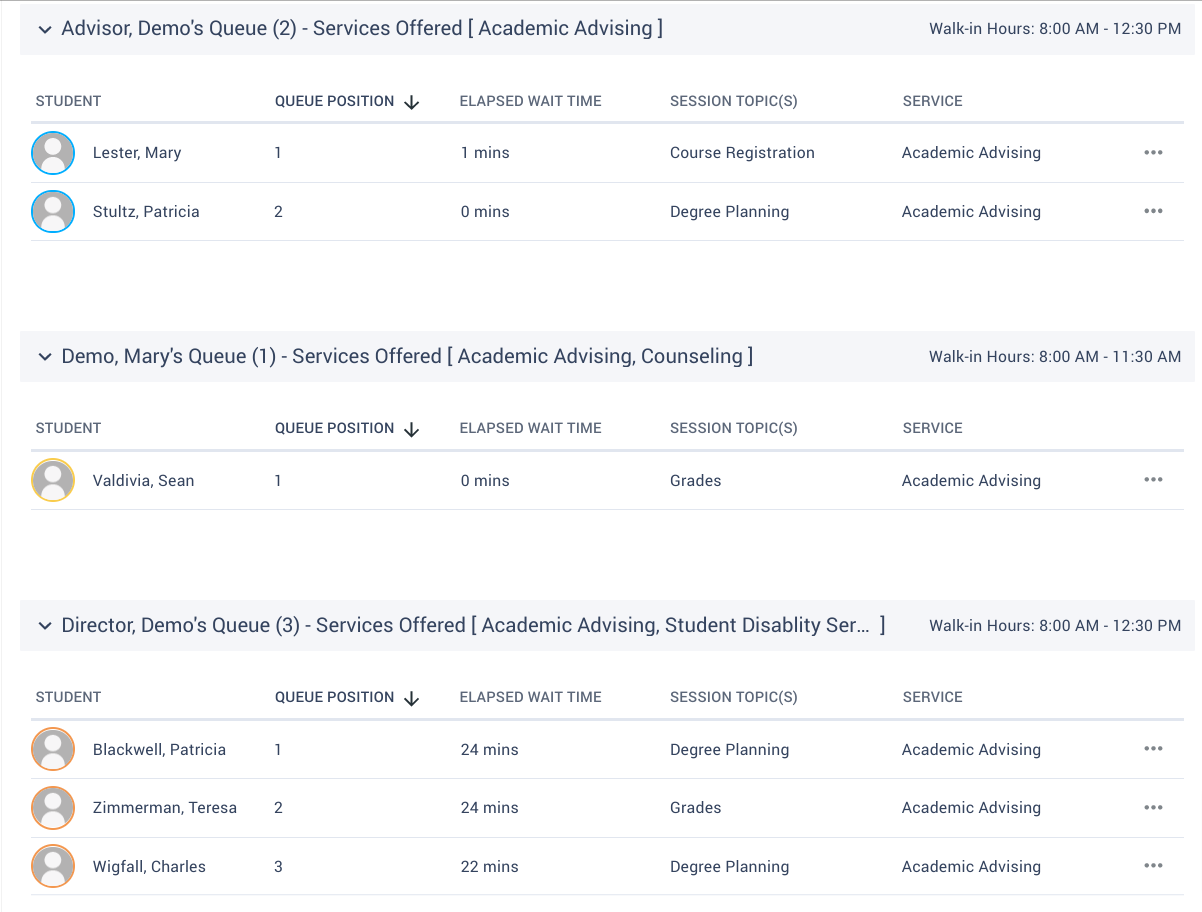
2 | Advisor Queues – The Queue Manager sees all of the queues for the advisors in the services they manage. These queues include students who have signed in via the Kiosk and those who have been added to the queue by the Advisor or Queue Manager. They can move students between queues, move students out of an advisor queue into the first available queue, or remove students from the queue.
3 | Completed – This section shows completed appointments or all advisors in the services they manage.
Adding a Student to the Queue
Both the Advisor and the Queue Manager can add a student to a Queue using the New Walk-In button on the Today’s Schedule or Queue Management page:

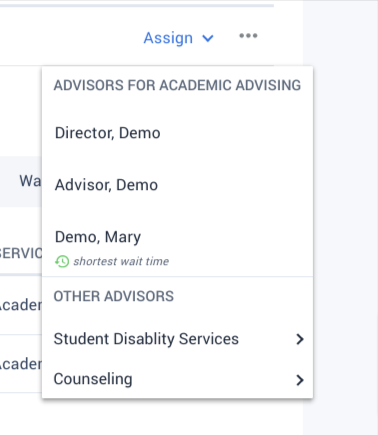
When filling out the form to create a new Walk-in appointment, use the Advisor field to select an available Advisor’s queue for the walk-in appointment, or the First Available Queue for the selected Service.
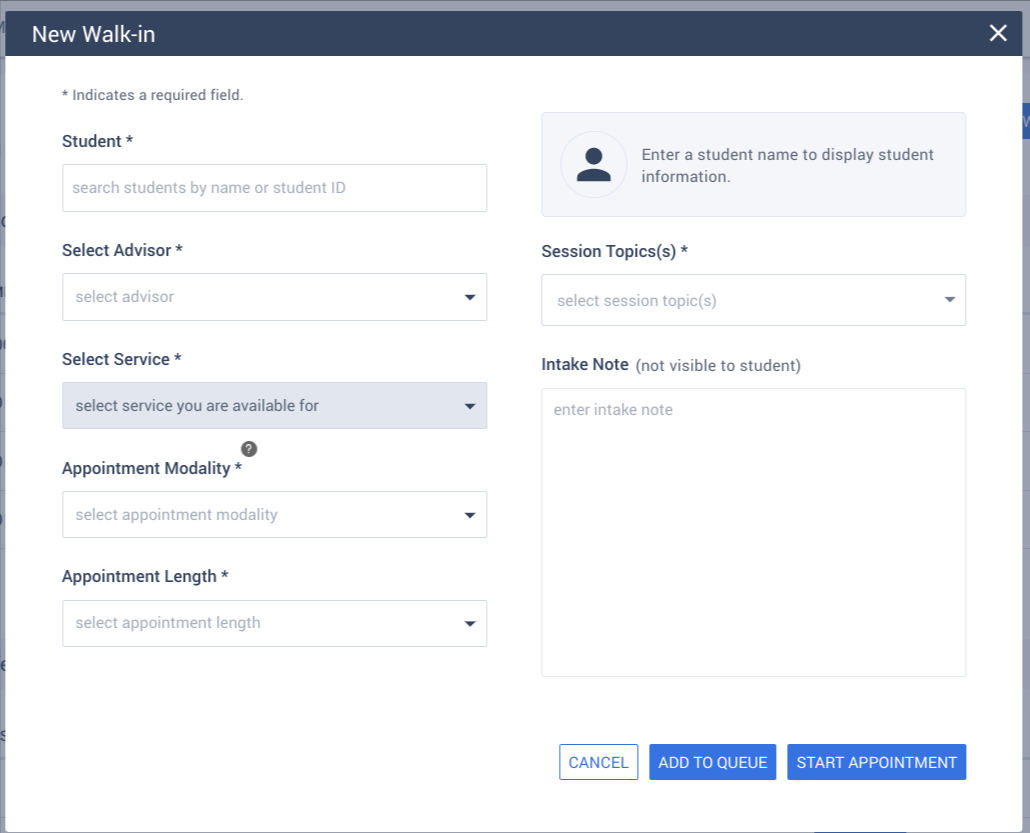
Students can also join an advisor queue or first available queue via the kiosk (see below).
Services
To be flexible enough for all of the ways that advising and student success teams meet with students and organize their offices, Advising has the concept of Services. A service defines a set of advisors that can meet with students based on their location, the type of advising they’re offering, or any combination thereof.
Services (along with locations) are managed in the Configuration area (the Manage Services permission can be assigned in User Management).
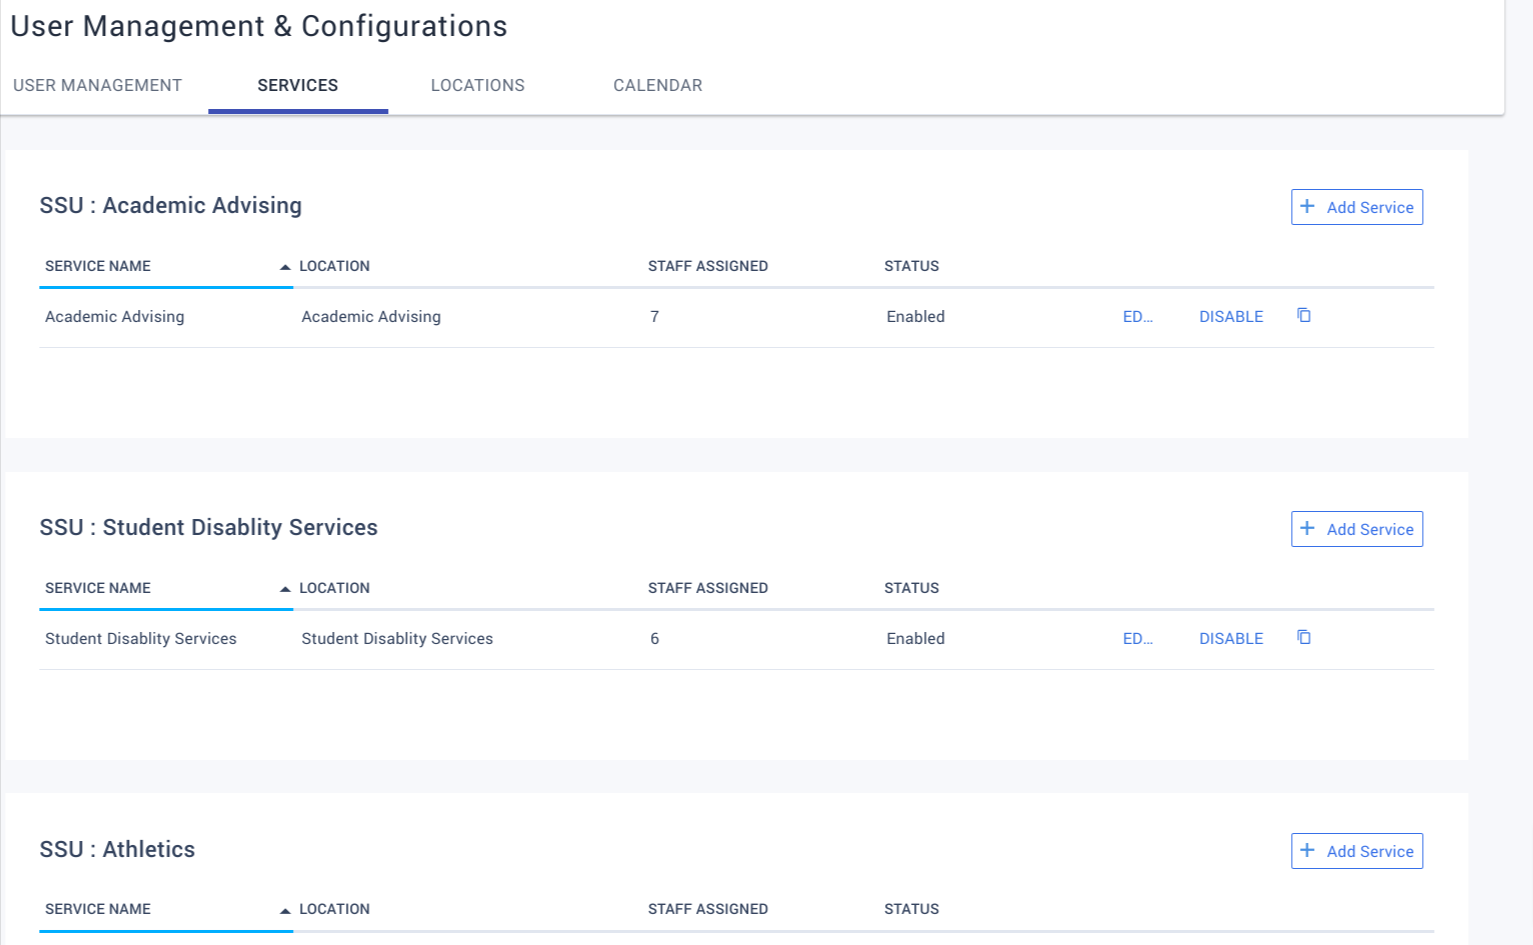
Each SSU starts with a default Service enabled with all of the staff members assigned to that service, assigned to a default Service location.
Each SSU can then add as many services as needed, with any combination of Locations, and with any number of staff members assigned to a service.

Why Configure Services?
Services let you manage two features:
- Queue Management – For each Service, one or more Queue Managers are selected. These users will be able to manage the First Available and Advisor Queues on the Queue Management page for all services they are assigned to. By setting up services, you can ensure that each is managed by the correct staff at your institution.
- Kiosk – Services also control how queues appear on a Kiosk. When launching a Kiosk, the Queue Manager selects the Location for which the Kiosk is being launched. When signing into the Kiosk, students first select which Service they’re there for, then select an Advisor’s queue to join in that Service. (See below for more on operating the Kiosk.)
For more on setting up Services, see Services Configuration.
Launching a Kiosk
Launching a kiosk for an office or service location gives you a way to let students sign themselves up for walk-in appointments. The kiosk is designed to be launched on a tablet or laptop, and it is optimized for use with a touchscreen.
The kiosk can be launched by any user with the Queue Manager permission for any location.
Caution: Disable auto-fill logins and passwords for any device or profile you’re using to launch the kiosk.
To launch the kiosk, follow these steps on the device:
- Enter the kiosk URL in the browser on the device you’re using. The URL is the address you normally use to login to Civitas Advising with -kiosk appended in the subdomain.
- Example: for demostate.inspire.civitaslearning.com, the kiosk is demostate-kiosk.inspire.civitaslearning.com
- Log in as you normally would (SSO or a local login).
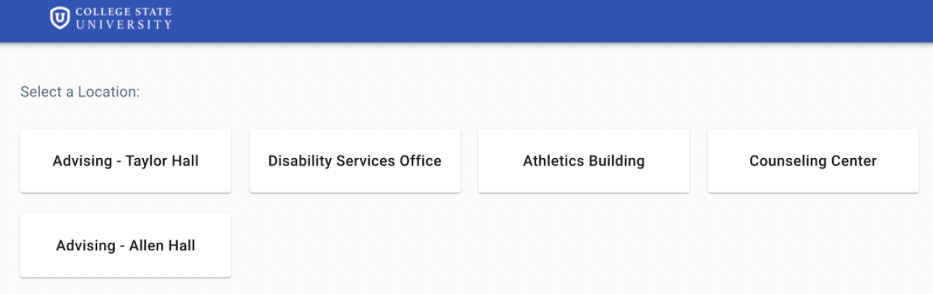
- Select the Location you’re launching the kiosk for:
- Once you’ve selected a Location, the student login screen will display.
- To log out of the Kiosk on a device, select the “Administrator log out” link at the bottom of the student login screen.
Student: Joining a Queue via the Kiosk
This is how students would use the kiosk to get into a queue:
- On the student login page of the kiosk, enter the Student ID Number and Last Name and select Sign In.
- Select an available service (only services that currently have advisors with Walk-in hours will display)
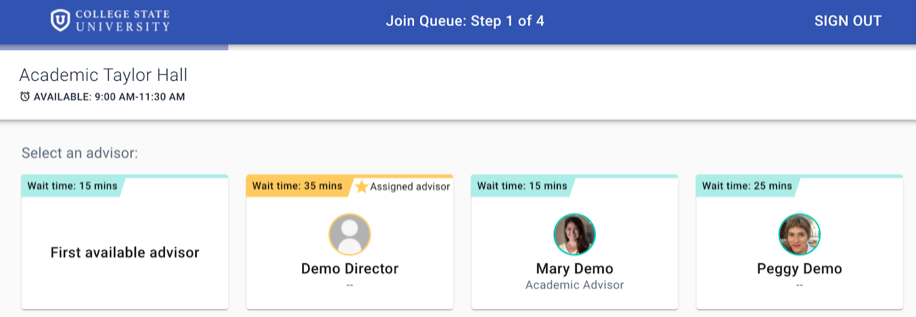
- Select an advisor’s queue to join, or join the first available queue. .
- After you select one, you can see the wait times for each advisor and for the first available queue. Your assigned advisor will be starred, if they are available.
- Select an appointment length.
- Select one or more session topics.
- (optional) Add a note to the advisor.
- When you finish, the kiosk shows your wait time and position in the queue.
- Sign out by selecting the link on the top right corner of the screen. (You will automatically be logged out of the kiosk after 60 seconds of inactivity.) Signing back into the kiosk will display the above screen with your updated queue position and wait time.
- If you run out of time to be seen, sign back in and select Leave Queue at the bottom of the screen.

Student: Checking into an Appointment
Students can also use a kiosk to check in for a scheduled appointment. If the appointment is within 30 minutes of the time the student logs into the kiosk, they will be prompted to check in for their appointment:

Important: Check-in via the kiosk is only for services that are associated with that kiosk’s Location.