Events
The Dashboard gives you a quick view of how many events you have today. You can get to events from that panel or from the Calendar icon on the left menu, and you can filter Event Type to only see Events:

Create an Event
Tip: You can create events for all students, or you can use groups to target events.
- Public events are distributed to students. All information added to an Event is shown to students.
- Private events are only visible to you.
- Attendance is automatically enabled if you add RSVP or check-in to your event.
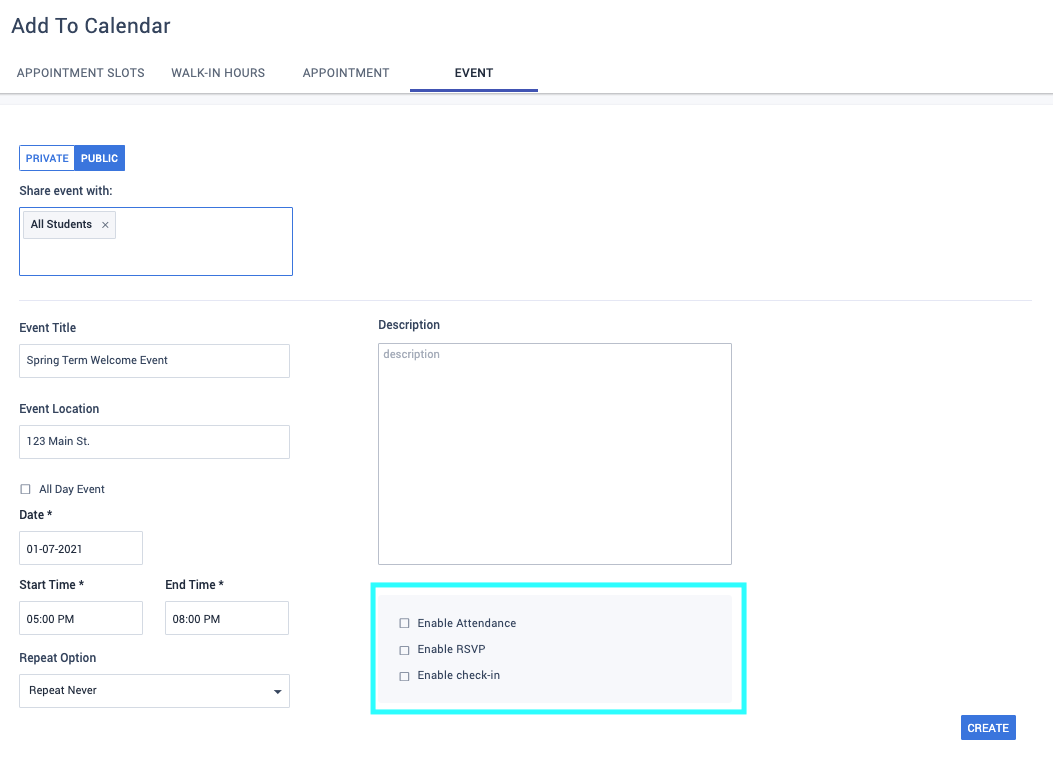
Attendance features appear only if you select Enable Attendance during event creation.
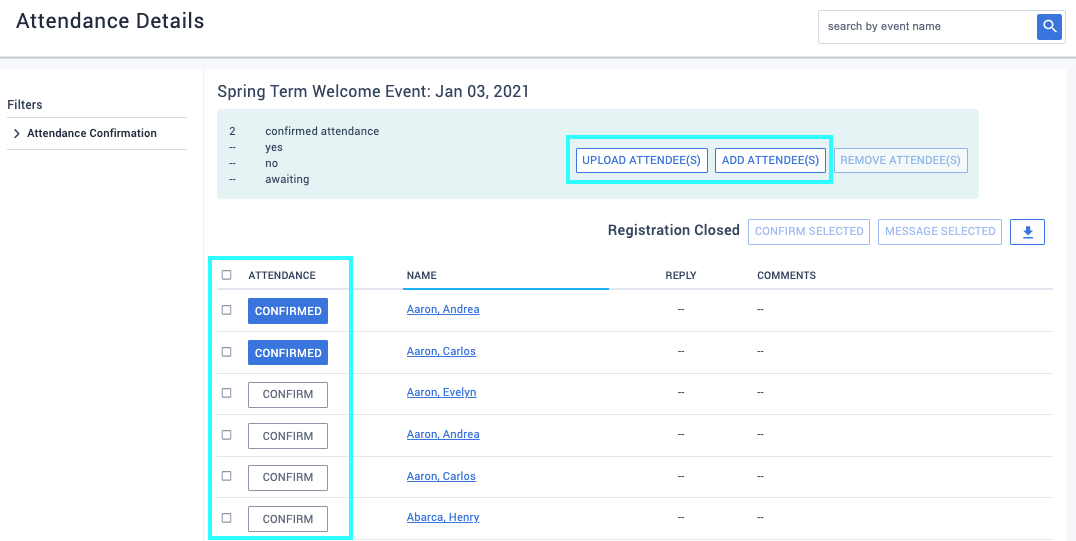
Once your event exists, hover over it on the calendar and select View Attendance. This opens the Attendance Details, where you can upload attendees (from an Excel spreadsheet) or add them by search.
Enable Attendance
You can enable Attendance tracking alone, for events where you will manage attendance after the fact, entering a record of which students were there, such as for a meeting that uses a paper log for sign-ins. Attendance tracking must be enabled for the event, or that event will not appear on the Attendance screen. Click on an event to view the details screen.

After an event, you upload or enter a list of students who attended. After that, you can message those students and download an Excel file of attendees.
You can manually click “confirm” to track attendance OR upload a .csv of attendees. You can also add individual students to the list that may have not been originally invited.
Enable RSVP
The Reply column shows the attendee’s RSVP status. You can manually click Confirmed to track attendance, or you can upload a .CSV of attendees. You can add individual students to the list that may have not been originally invited. You can stop new RSVPs at any time by clicking Close Registration.
