Advising Settings
Important: Be sure to take the time to set up your account! Your settings control how staff and students will see you and your contact information throughout Advising.
Step 1: Create Your Profile
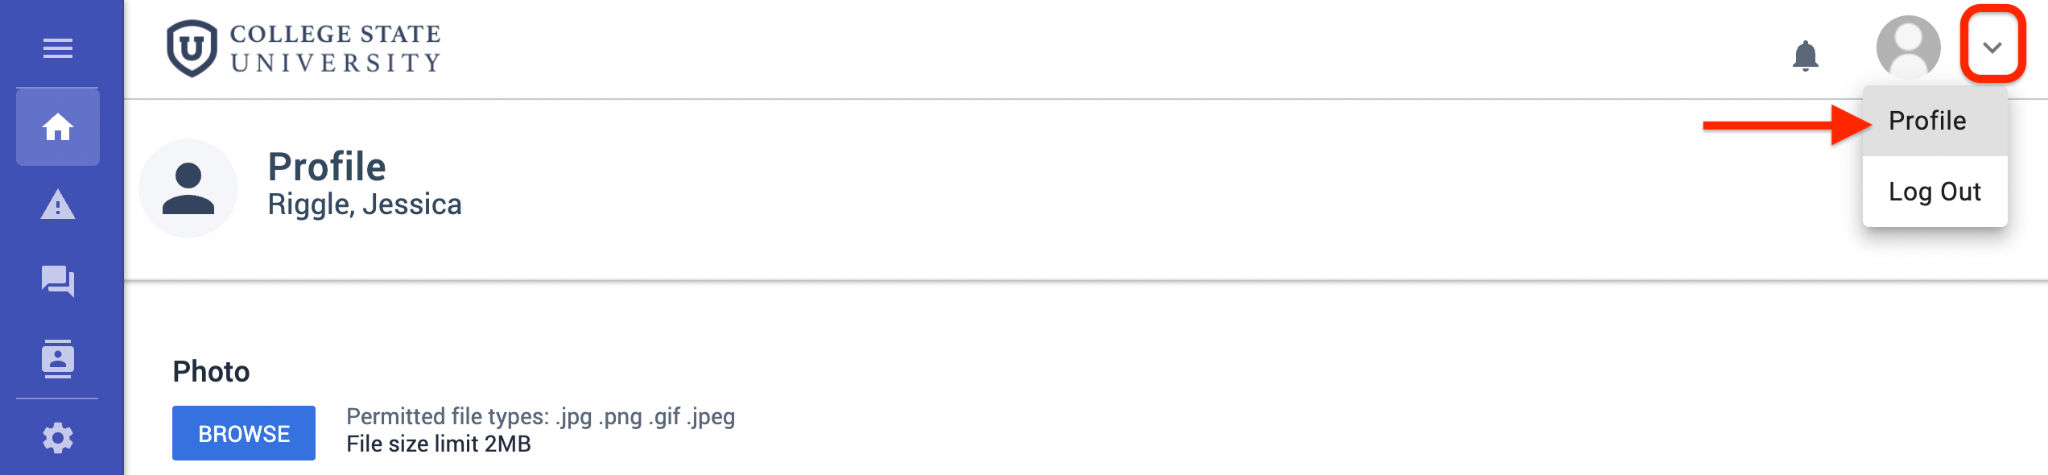
At the top right of the page, click the profile icon and select Profile from the drop-down menu.
Be sure to:
- Provide your contact details, which will appear in the Directory for staff and students.
- Carefully check your name, title, phone, email address, and office location.
- Must be .png, .gif, or .jpg/.jpeg
- Must be smaller than 50MB
Tip: From the side menu, open the Directory page, and check your listing for any errors.
Note: You can find and email advisors from the Directory page, but those conversations aren’t captured in the Communication inbox, which is for student communication.
Step 2: Choose Your Settings
From the left menu, select Settings (gear icon). Be sure to work through the entire page of settings, which appear in this order:
- Visibility
- Visible — By default, you are visible (for searching and contact) to all students in your SSU.
- Invisible — Only your assigned students will be able to find and/or contact you.
- Important: If you disable appointment emails, your external calendar cannot sync!
- Sync and test your calendar integration
- Integrate Zoom (if implemented at your institution)
- Set how sync should affect your Appointment Slots
- Announcements — If you have permission to send Announcements, set a signature for them.
- Emails — Add the signature with the contact information that you want to include for students at the end of your email messages.
How to Sync Calendars
Bidirectional sync is available for institutions that use Google Suite or Outlook Exchange for calendaring.
How bidirectional sync works
It works both ways: your Advising items are pushed to your work calendar, and your work events block out time on your Advising calendar, but in private mode (only showing that you’re busy):
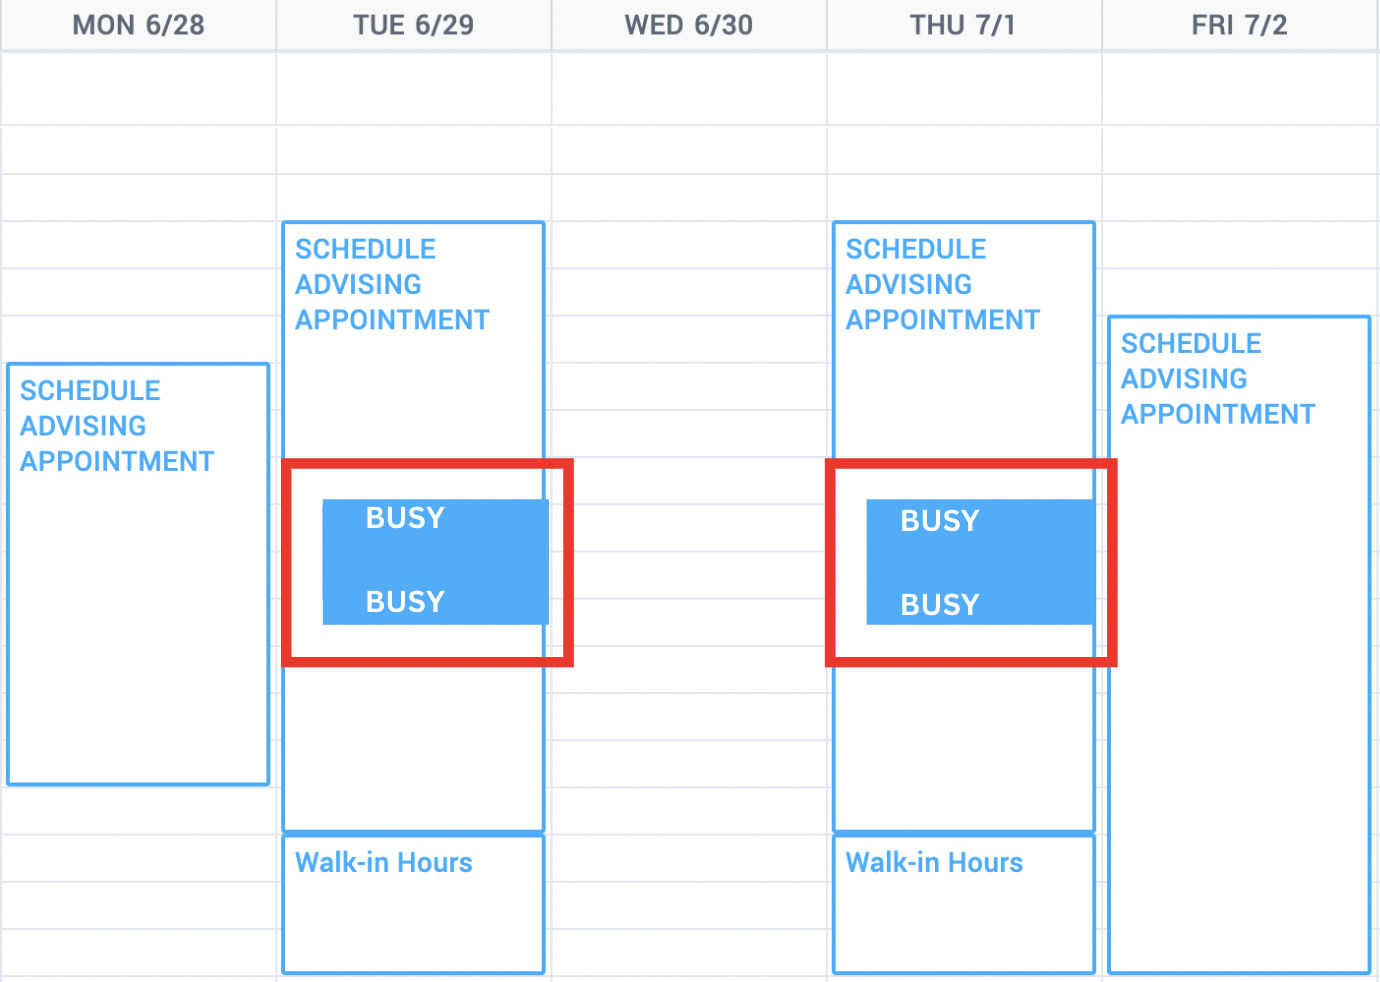
This is for staff only: students cannot sync with Advising calendars, and they see your private events just as appointment slots that are unavailable.
How to share your Google calendar
If your institution uses Outlook, your IT handles the integration for you; if your institution uses Google Calendar, you first need to share your Google Calendar, a one-time setup:
- Share your Google Calendar with Advising.
- Open your Google Calendar and open its Settings (gear ⛭ icon).
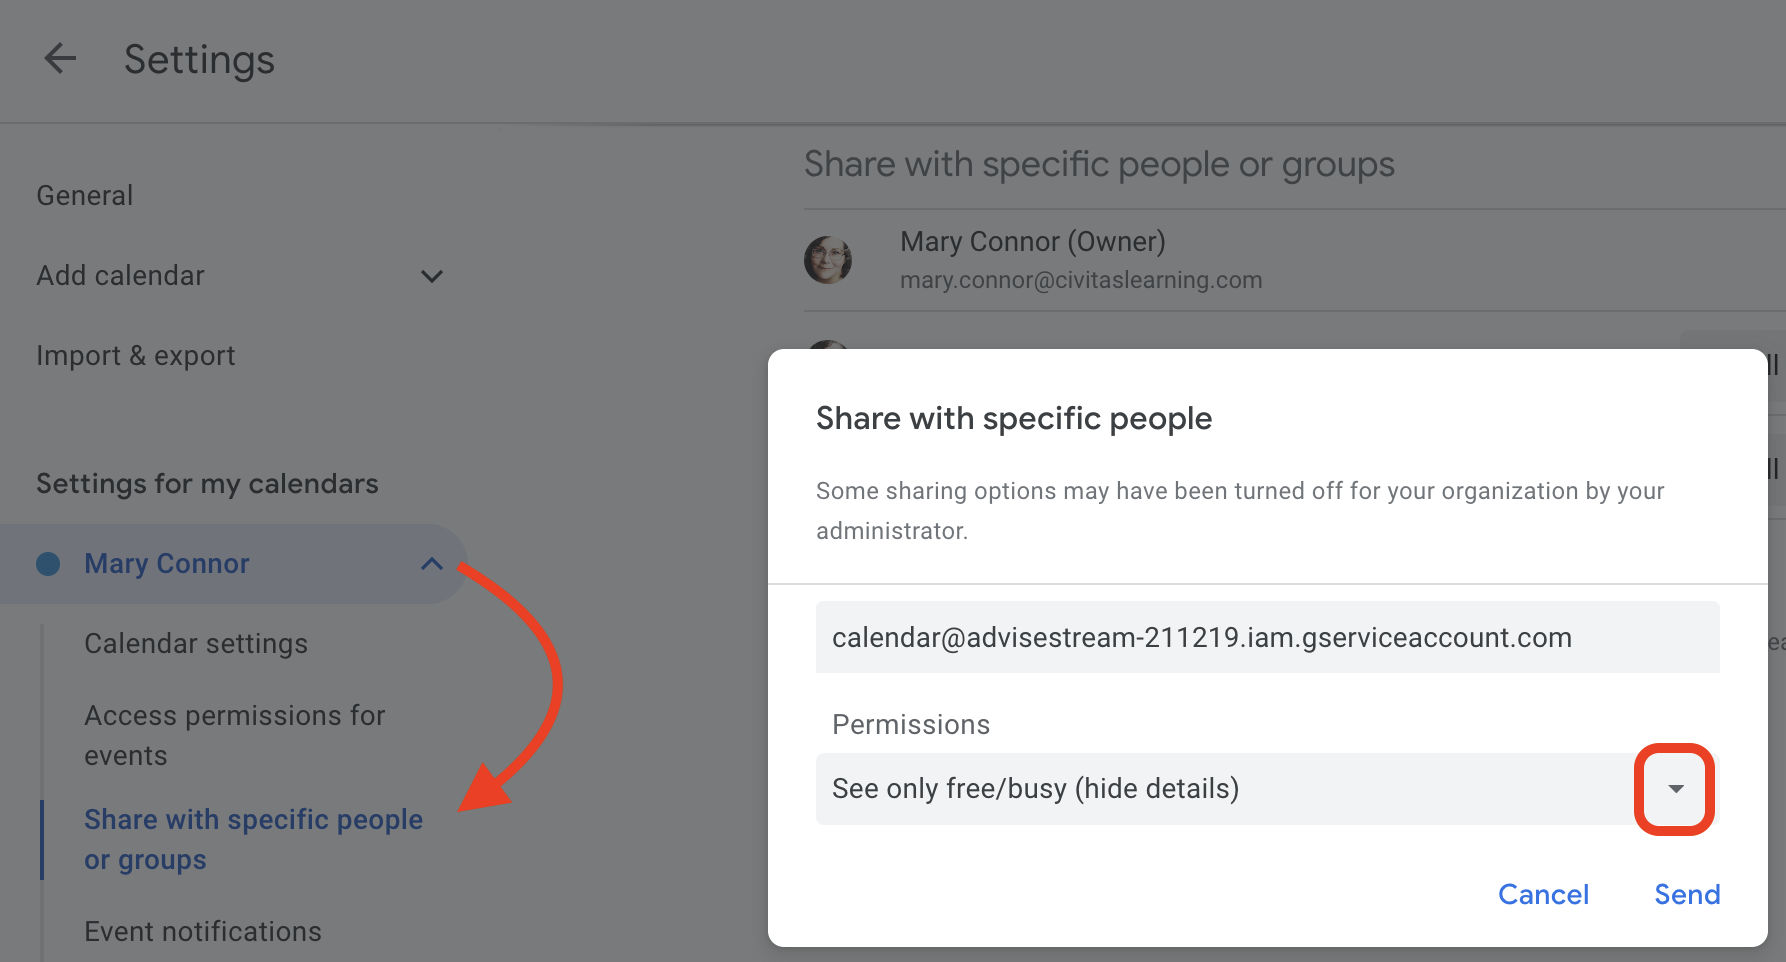
- Under Settings for my calendars, select your name (the first entry).
- Under Share with specific people, select + Add people and groups.
- Enter this system email:
- For Permissions, select See only free/busy (hide details).
- Select Send.
- Next, add your Google calendar to Advising (see below).
How to add your Outlook/Google calendar
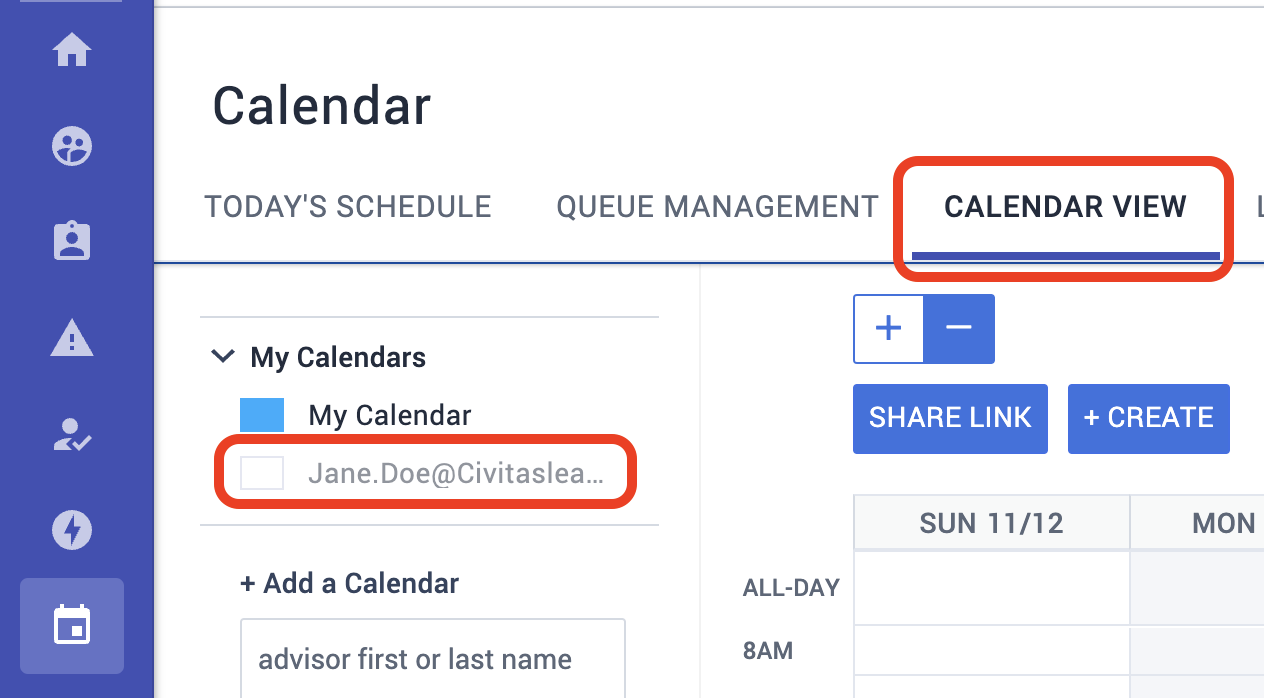
From Calendar > Calendar View, look under My Calendars.
- The first calendar is always your Advising system appointments.
- The second calendar, named as your email, connects to your Google or Outlook calendar.
Important
If you ever see a red exclamation point ( ! ), your Google Calendar is not syncing with Advising and must be re-enabled. See above.
To add your calendar, update your Advising settings:
- On the side menu, access your Settings (gear ⛭ icon).
- Scroll down to Synced Calendars, where you’ll see a space to add your Outlook email.
- Select Test Email to be sure it’s working.
If you don’t see a ✅ Success! message, check your spelling and try again.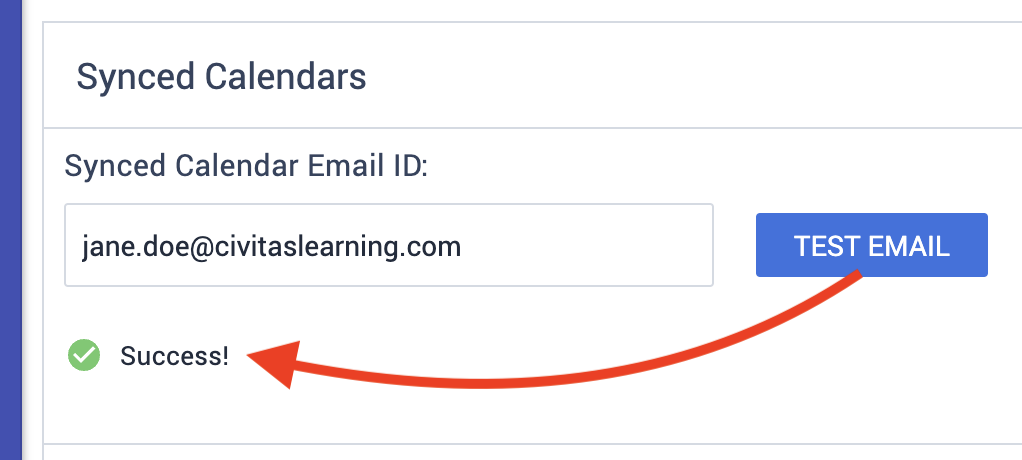
- For your synced events to show you as Busy/Unavailable on your Advising calendar, keep these default settings:
- Block Appointment Slots — Yes
- Appointment Slots — Busy
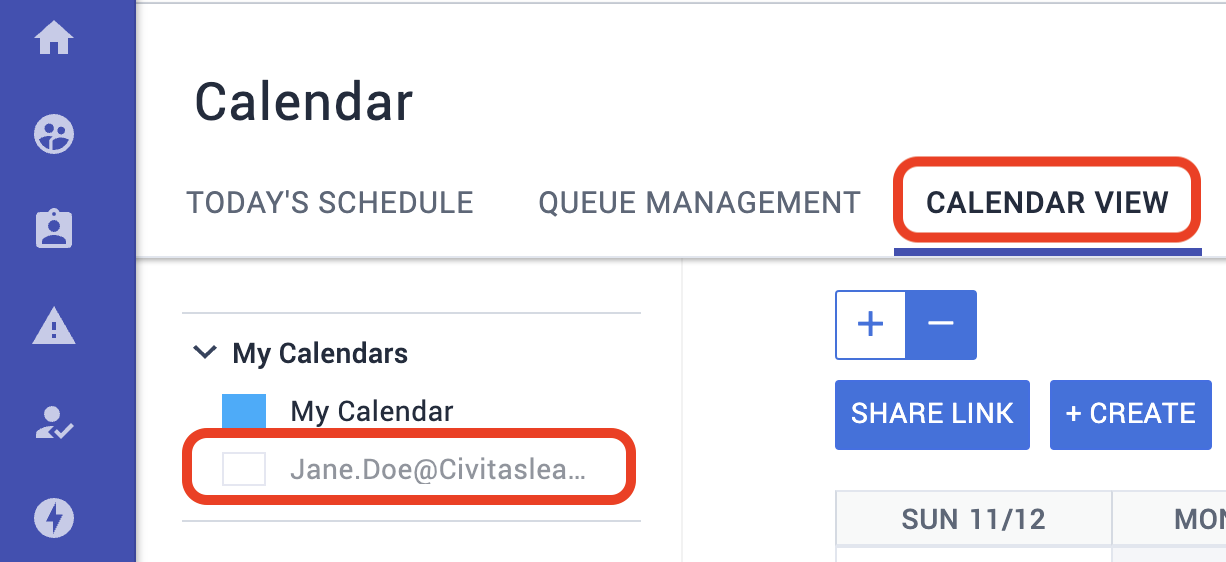
Next, check your Advising Calendar to verify that events are syncing:
- On the side menu, access your Calendar (calendar 🗓 icon).
- Select the Calendar View tab.
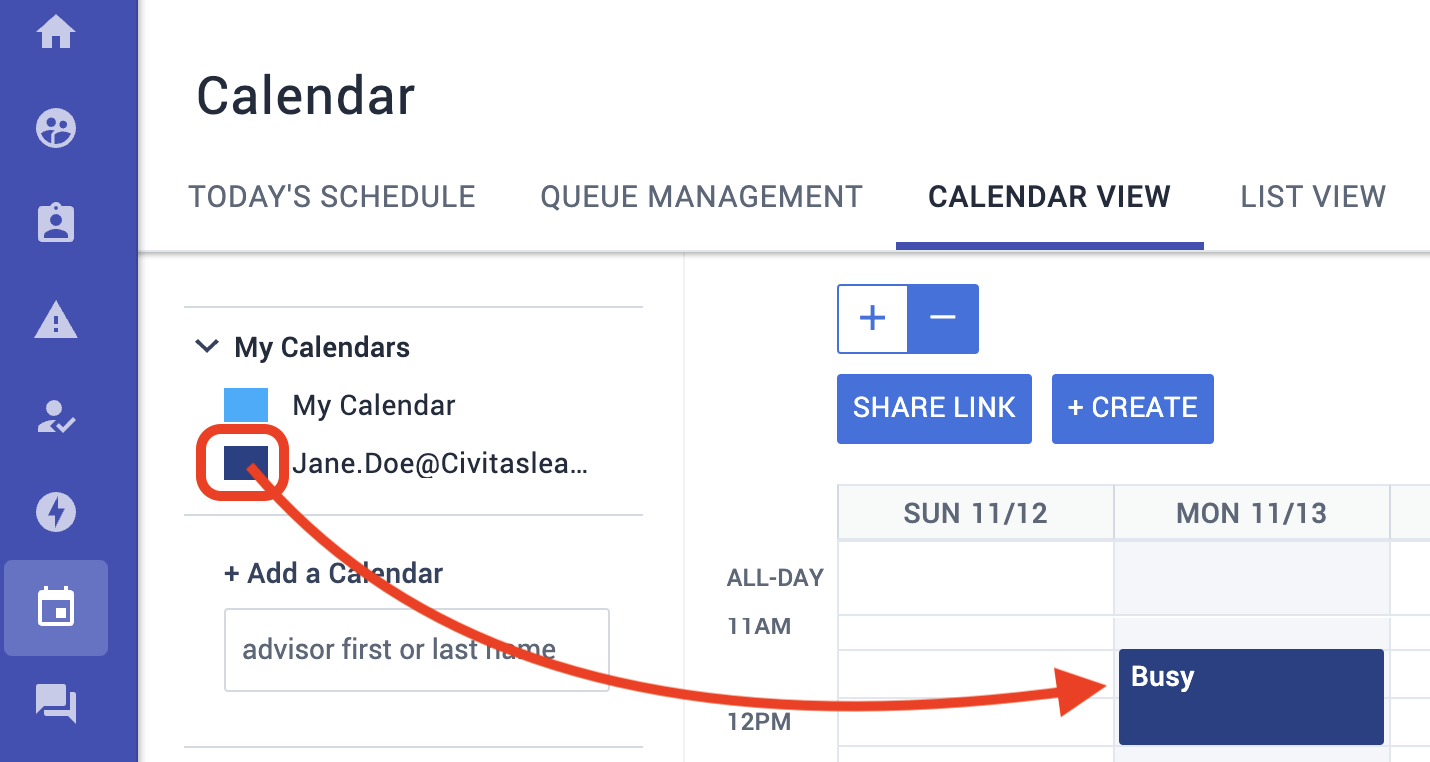
- At the top left of the tab, under My Calendars, locate and select your linked calendar, which is listed as that email address. (This unhides it from view; the syncing is always on.)
- Your synced calendar events are color-coded to match the calendar they apply to. Your Outlook calendar events appear as Busy for students:
How to automate unavailability
You can make your Advising appointments honor your time conflicts automatically:
- In your Advising calendar, create standing appointment slot blocks with a Repeat Option so that they set your availability across the entire term.
- Sync your personal work calendar to block out your unavailability.
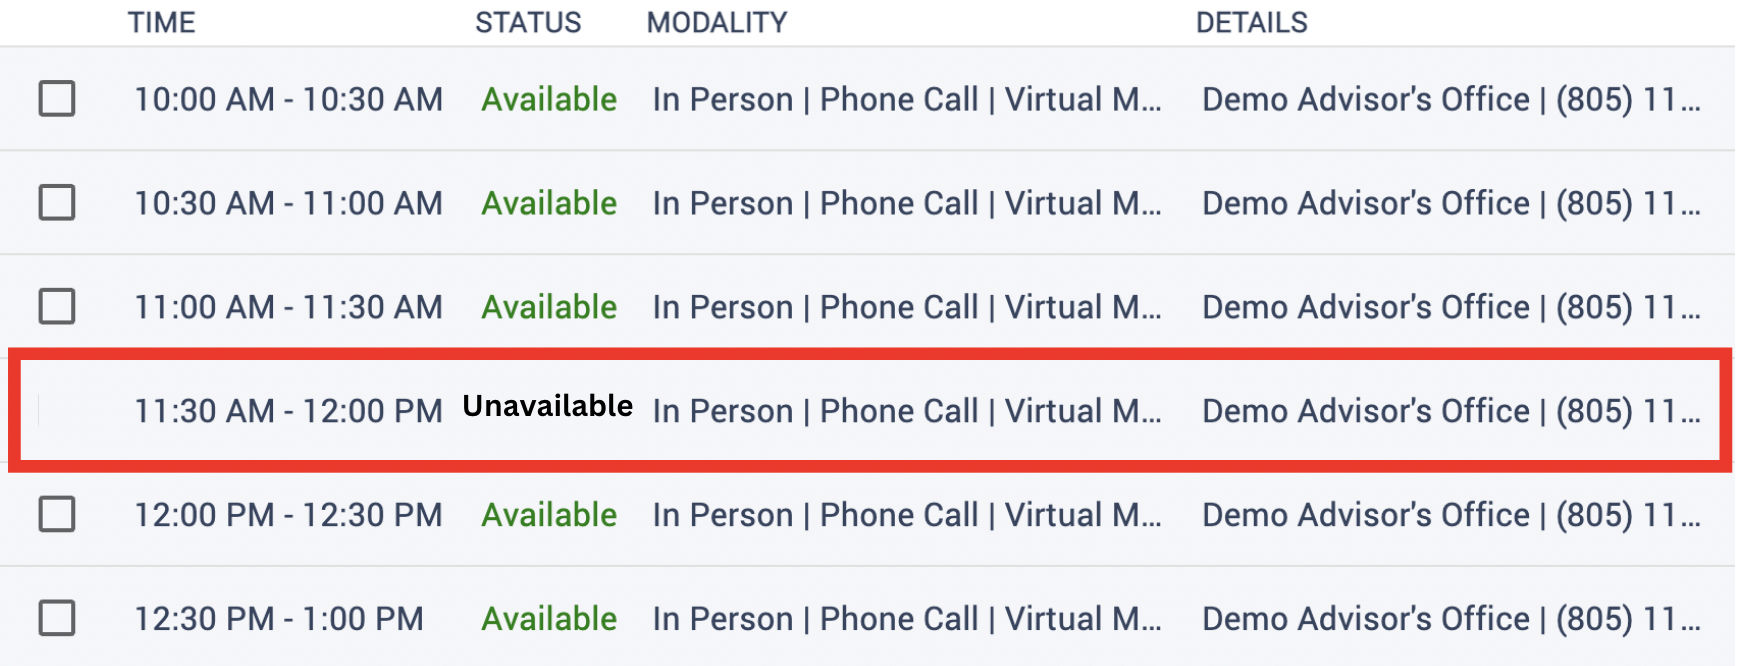
- Whenever you have a personal outage or work event, always set it to “show as busy” so that students see those times as Unavailable:
How to integrate Zoom
If Zoom integration is enabled, you can connect your institutional (not private) Zoom account to automate the creation of Zoom meetings for your appointments and events:
- From the left menu, select Settings (gear icon).
- Scroll down to Synced Calendars and select the Connect Zoom Account button.
- When you are redirected to Zoom’s website, log in with your institution (not private) email.
- Once you have authorized the connection, you are returned to the Settings page, where you see the status CONNECTED.
- You are now able to schedule appointments and events as Zoom meetings, and directions for joining the meeting will be included in the appointment notifications that students receive.