Create Course Alerts
Step 1: Get to Course Alerts
- Select Course Alerts from the left menu or from the Tasks panel of the Dashboard:
- Select one of your course sections.
- On the course roster that opens, scroll and locate the student who needs an alert.
- In the row for that student, look for which alerts are open for you to create.
- General Alerts can be added at anytime
- Checkpoint Alerts must be created at specific times in the term (if they’re grayed out, it’s not time)


Step 2: Set the Alert Level
From the drop-down list, choose the Alert Level:
- Commendation — (General Alert only) Recognizes noteworthy performance. No resolution needed.
- OK — (Checkpoint only) Verifies that you have no concerns for the student. No resolution needed.
- Tip: This is the only alert that you can multi-select students for and apply in bulk.
- Medium Alert — Flags a student with an issue that might lead to serious consequences.
- High Alert — Flags a student who is in immediate danger of failure or other serious consequences.
The alert descriptions are customized for your institution, but the levels are not. Advisors will always be the ones to resolve Medium/High Alerts.
Step 3: Personalize the Alert
According to the alert type you selected, you’ll see the specific options prebuilt by your institution, as well as ample space to write a message to the student, which is a best practice and can help supply needed context to the advisor who will attempt to resolve the alert.
You have two other ways to personalize your message:
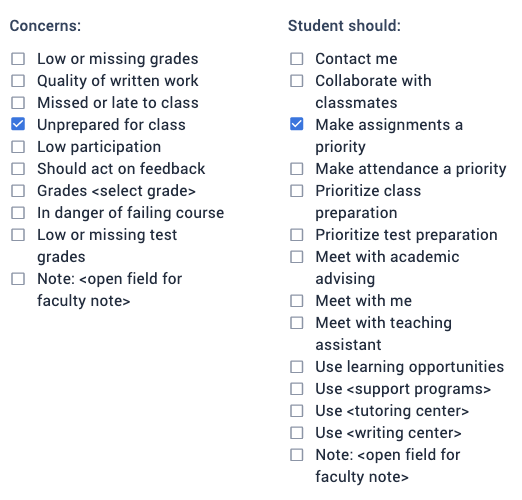
- For Concerns, select the open Note: field to write your own
- For Student should:, select the open Note: field to write your own
What’s required? You can be as quick or careful as the student’s situation calls for:
- Minimum: Just select one or more preset checkboxes for concerns and directions.
- Recommended: Select the preset checkboxes and write a message to the student.
- Write your own concerns and directions, and write a message to the student.
Step 4: Guide the Advisors
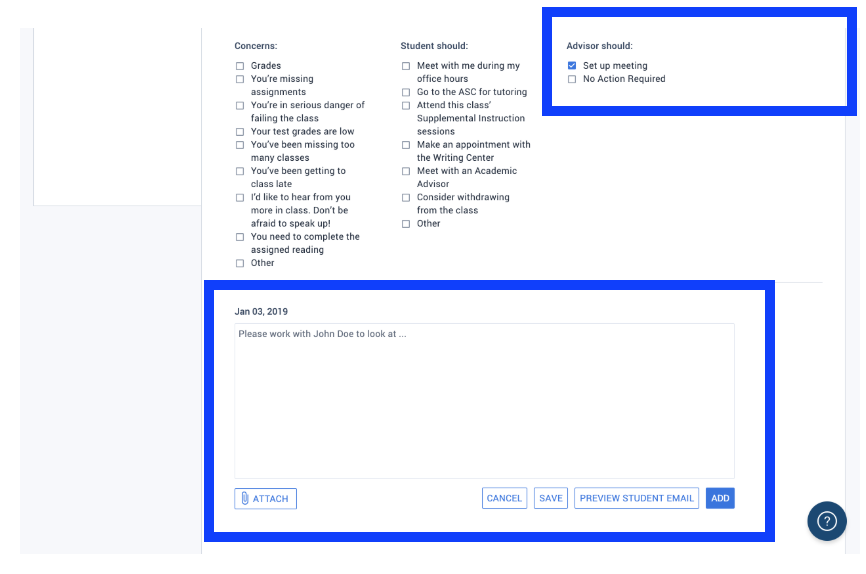
Use the final notes field to engage the advising team in supporting your student’s needs.
- Select Advisor should: items in the template, write a note, or both, to engage and guide the advisors.
Step 5: Close the Loop
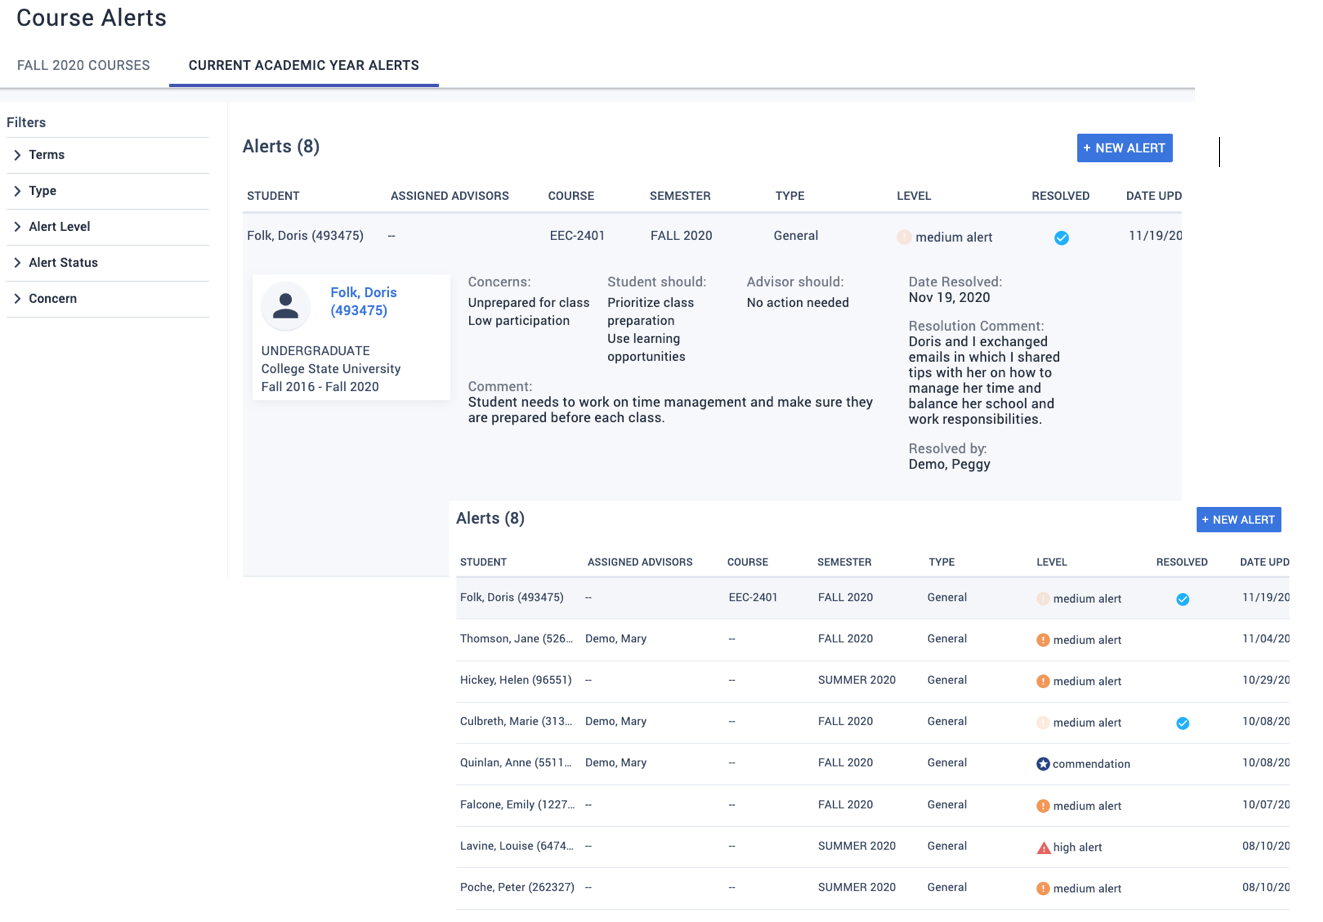
On Course Alerts, you can see all of the alerts you have raised on the Current Academic Year Alerts tab.
- Click a student’s name to see updates from advisors, add your own comments, or view resolution comments for your alert.