Planning Templates
Students need the structure of prebuilt degree sequences (templates) to follow in creating their own plans. Templates formalize your institution-specific guidance on which courses to take and in what order, so that students can complete their degree path on time.
Note
You need the Manage Templates permission to create and manage your library of Plan Templates and Placeholders. This permission lets you edit, manage, and view all templates across all users and statuses. This makes it possible for stakeholders to review changes before publishing.
Template Library
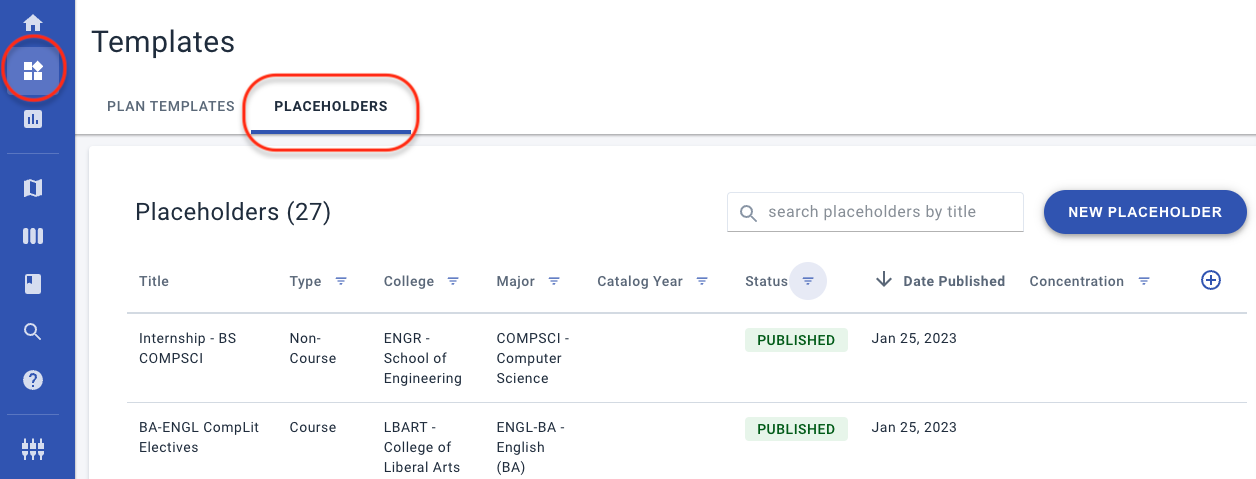
The Templates library (select the blocks icon on the sidebar) manages templates centrally for your entire institution. This central library lets your advising team keep the templates up-to-date, view their details, and share them directly with students.
There are two types of templates:
- Plan Templates — these are the degree plans that advisors can apply to a student’s plan.
- Placeholders — these are the prebuilt course and non-course placeholders to be added to templates and plans. Create these first so they’re ready for building plan templates.

Search — Use the search box next to the New Template button to determine if the template you need exists yet. Use search terms that appear in the template’s Title.
Example: If you know the template is for the College of Agriculture but that word doesn’t appear in the template title, searching on “agriculture” won’t list it.
Tip: All columns are sortable. Select a column heading, such as Major, to sort the templates alphabetically by that column; select the heading again to sort them in descending order.
Status — Because templates and placeholders must not change mid-stream on students, the library only allows changes to templates in DRAFT mode. This means you will never edit an existing PUBLISHED or ARCHIVED template. Instead, you select COPY and make your changes on a new version, which will replace the old one.
- DRAFT — Blue means the template is writeable but can be seen only by its creator.
This is the only mode in which edits may be made to a template. - PUBLISHED — Green means the template is visible and read-only, available for you to APPLY to student plans. If changes are needed, select COPY.
- ARCHIVED — Gray means the template is visible and read-only for staff members only. You cannot APPLY it to student plans, but you can COPY.
Sample Workflow
Steve needs to update the template for the B.S. Biochemistry degree. He searches on “biochem” and locates the template. He opens it and selects COPY. In the popup “Template copied successfully”, he clicks VIEW. He makes the corrections to the foreign language requirement that the college reported as being wrong. He leaves the template in draft mode until he can complete it. Once he verifies the requirements from the auditing system, he selects PUBLISH. He then opens the prior version and selects ARCHIVE, so that advisors cannot accidentally send out the old one.
Naming Conventions
Because Search depends on the template’s Title, use a thoughtful naming convention that is comprehensive enough to be self-explanatory and findable. Users do type-to-search to filter templates and reusable placeholders dynamically, so create a naming convention that will help them identify all items and variants by Title, quickly and accurately.

Best practices
- Use acronyms common at your institution and used in your course catalog
- Be consistent; it may help to plan them out in a shared spreadsheet
- Build the names from general to specific, for easy grouping and sorting:
- “Internship – U.S. DOJ – Pathways”
- degree > majors > minors > concentrations
“B.A. English, Technical Communication”
Example
For a course placeholder “Foreign Language”, name it “AA BUSADM Foreign Lang”, which captures the degree (Associates) and major (Business Administration) it’s created for. Named that way, it won’t be confused with language placeholders for other degrees and majors, which could be different.
Building Placeholders
Reusable course and non-course placeholders make template creation much faster:
- Courses: You can define a known requirement for a general elective just once, with its allowed courses, and drop it into any number of plan templates that need it.
- Non-courses: You can define non-course placeholders for standard program milestones, such as when to seek an internship or apply for graduation.
Placeholder library — Go to Templates > Placeholders to build your library of reusable placeholders. The placeholders you create here can be added to plan templates during and after deployment, but they can also be added by Advisors to individual student plans.
Add existing placeholder — To add an item to a template or plan, select + Add > Placeholder and then type-to-search for existing placeholders, or else add a new one. (Students can only create their own non-course items.)
Placeholder Locations
To help you manage placeholder reuse across your entire Template Library, the Placeholder Library displays a Template Locations table to let you know if the Placeholder is being used on any templates, and, if so, which ones.

The Template Locations list gives you these controls:
- Click a template in the list to open it (it opens in a new browser tab)
- Click the Status filter to select one or more statuses to view (Archive, Draft, Published)
- Click the Title heading to toggle the sorting direction by name
Use the Rows per page and paging arrows to scroll through large numbers of templates

Important: This reports placeholders used within the Template Library, not individual plans.
Managing Placeholders
These are keys to using the placeholder library effectively:
- Only specify the fields that are needed (most are optional).
- For example, if your institution never updates requirements until they change, do not specify the Catalog Year.
- Keep your items in DRAFT mode until approved: once published, they are read-only.
- If you have a multi-campus institution, specify which campus the placeholder applies to.
- Use Add/Remove Columns (⊕) and column filters (▽) to trim your view to just the fields you want to work with. (This does not change the view for others on your team.)
- For example, when working on non-course items, filter Type to Non-Course only.
Important: Placeholders are inserted into templates and plans without any links to the source; if an update is needed, follow the process below.
Updating Placeholders
If you need to change a reusable placeholder, follow this process:
- COPY the placeholder, make your changes, and remove “copy” at the end of the title.
- PUBLISH the new placeholder.
- Immediately ARCHIVE the old placeholder (verify the older one by Date Published).
- As appropriate, edit the affected plan templates:
- COPY the plan template.
- Delete the old placeholder and add the new.
- PUBLISH the new plan template.
- Immediately ARCHIVE the old plan template.
Building Plan Templates
With the Manage Template permission, you can build a plan template that lets you share the same plan with any number of students without recreating it over and over again. You create templates using the builder provided (the NEW TEMPLATE button).
When you create a new template (or COPY an existing one), you work with these elements:
Details
On a template, select the details (such as College, Degree, Major, Minor, as configured for your institution) to clarify the scope and use of the plan for the advisor who will apply it.
Tip: The Description field is optional, but it is a good opportunity to capture context and motivation, such as to explain how a B.A. alternative differs from the B.F.A. degree and why you might choose it.
Double Majors — You can design plans for multiple majors and multiple minors. These variants must be separate plans, not additions to an existing template. This means that if, say, Economics requirements change, you might need to update both an “Economics” plan and an “Economics/Mathematics double major” plan.

Term
On a template, you add the ordered set of semesters or sessions that are being planned out, including blocks that might need to be scheduled, such as Summer and Winter terms.

Start terms — If it’s common at your institution to have similar but slightly different templates for different start terms, create templates for both scenarios and use a naming convention such as “Art History- Fall Start” and “Art History – Spring Start”. You do not need to build each from scratch: Build your first template, such as “Art History – Fall Start”, then click Copy to create another version. Edit the copied version and Publish.
Course
On a template, you add a course to a given term by selecting + Add > Course, and then typing values to look up active courses from your catalog.

- To add a course, select + Add > Course from the bottom of a specific term and type to search for it.
- Auditing — Currently, plans do not reconcile against degree requirements, nor do catalog lookups filter by them.
- Troubleshooting: You cannot add a course unless it’s “active” in the catalog (effectiveStatus = ‘active’ AND catalogPrint = ‘true’). If you see problems with course availability, contact your implementation lead or Support.
- To move a course, drag it to another term’s panel.
- To remove the course from the entire plan, open (click) it and select Delete (bottom left).
Required and Locked Items
On both templates and individual plans, you can require and/or lock individual courses, non-course items, and placeholders. To enable or disable each, slide the toggle.
- Required — Students cannot delete an item flagged as required, but they are free to move it to a different term.
- Locked — Students cannot delete or move a locked course. Locking can help prevent errors, such as when moving a course from a term would jeopardize the timing of subsequent courses. They must work with their advisor to have the lock changed.

Course Placeholders
Course placeholders are visual flags to prompt the student to take action and select a course that meets the requirement. When the student clicks the placeholder, they choose from a prebuilt set of courses (or they type to search the course catalog according to the placeholder’s instructions).
How it works — Course placeholders are flagged with yellow highlighting, which alerts the student that they have options to pick:
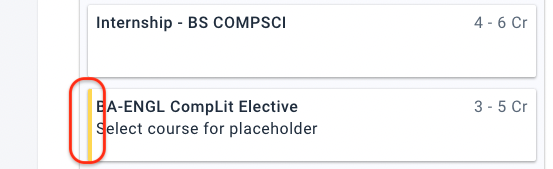
As soon as a course is selected, the placeholder’s name is replaced by the course, but the yellow highlighting remains as a flag. To pick a different course, open (click) the placeholder:

No courses — You can skip entering specific courses if you provide instructions in the Description. In this case, the student will type-to-search for courses that match your guidance:

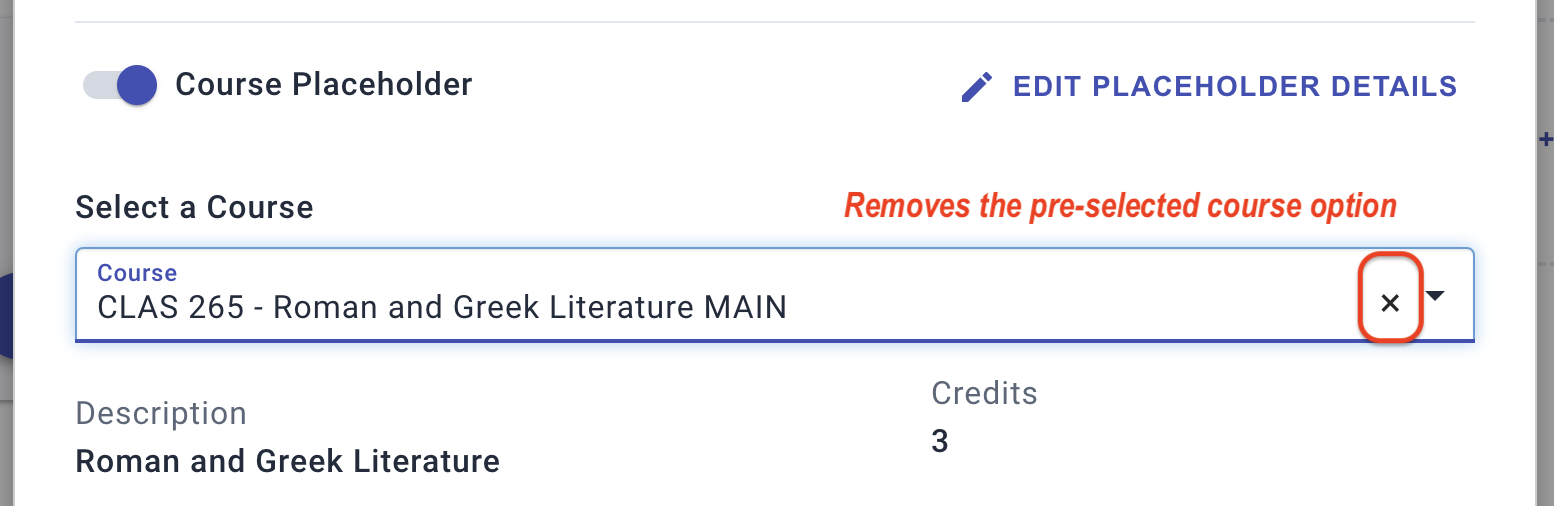
Changing courses — To add or remove courses from a placeholder, select Edit Placeholder Details.
- To make a course selection, pick from the Select a Course drop-down list.
- To remove the current course selection, click the ✕:
Adding a Placeholder
To put a course placeholder on the template, select + Add > Placeholder.
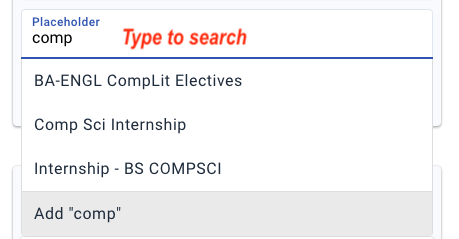
- To add a predefined course placeholder,
- Type-to-search the placeholder’s title and select one from those that appear in the dynamic list:
- Type-to-search the placeholder’s title and select one from those that appear in the dynamic list:
- To create a placeholder for this template only,
- Type in a complete title and press Enter.
- Enable (slide) the Course Placeholder toggle.
- Either type-to-search courses to add, or provide instructions in the Description.

Non-Course Placeholders
On templates, non-course placeholders hold suggested or required degree milestones, such as internships and program applications.
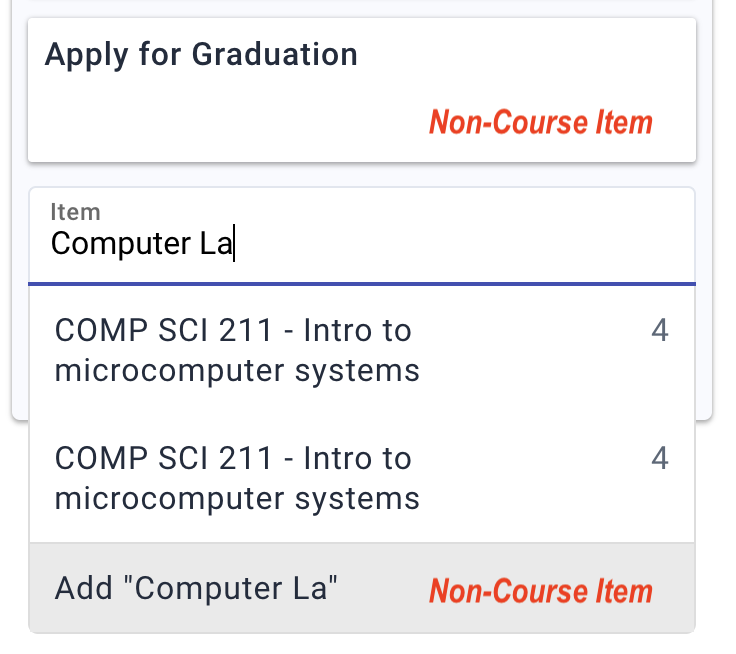
- To add a predefined non-course item, select + Add > Placeholder, start typing the title, then select the item from the search results.
- To create a new non-course item, select + Add > Placeholder, and start typing the title of your new entry. As you type, fewer and fewer results will populate in the drop-down list, so you can then select the final “Add …” option and this non-course item will then appear on the term.

Course Alerts
Planning provides several types of course alerts (flagged with red) to head off trouble:

Course requisites — For each course added, Planning warns you about any and all requirements that could block students from taking the course:
- prerequisite — what they must complete first or test out of, such as an introductory course
- co-requisite — what they must take at the same time, such as a required lab for Biology
If you add a course that has requisites, check the requirements highlighted and adjust the template as appropriate.
Duplicate course — Planning alerts you if you try to add a course that already appears in another term of the template. You will see the alert on both instances of the duplicated course. To get rid of the alert, delete the course from one of the terms.
Note: These additional course alerts appear on student plans only:
- Unavailable course — Alerts if a planned term includes a course that isn’t available for scheduling in the current term. These alerts only kick in when registration for that term opens, which means the actual courses and sections are now official.
- Course no longer active — When a course no longer has an effective Status of “active”, it’s not available for the student in the future. If a new version of this course is available, we will update the course accordingly.
Comments on Templates
On a template, use comments to provide general advice, reminders, and cautions related to succeeding with this degree plan.
Template comments are permanent: they cannot be deleted from a student’s plan.

Updating Templates
If you need to change a plan template, follow this process:
- COPY the template, make your changes, and remove “copy” at the end of the title.
- PUBLISH the new template.
- Immediately ARCHIVE the old template (verify the older one by Date Published).
- As appropriate, notify affected Advising staff to apply the new template to existing plans.
- Tip: You can send them the URL of the new plan.